In this post, we take a look into the plugins needed to mix and master death metal, black metal, and other genres of metal.
Why only plugins? Two reasons: good hardware if often prohibitively expensive, and digital technology has come far enough that plugins aren’t just for hobbyists: many professionals rely on them daily. You don’t need to spend thousands, on say, an SSL console, now that analog modelling is so accurate and efficient. That’s great news for musicians who rarely make any money.
This article is targeted at beginners, and assumes that the reader is just starting their journey into metal recording and production. I’ll briefly tell you what these plugins do, and where to use them. I’ll also include my own personal recommendations for both premium and free VSTs: high-grade options that will get the job done and won’t bankrupt you.
Note: this article is focused on mixing and mastering. For amp sims, check out my recent article on the best amp sims for metal. An article on drum software and samples will be coming soon.
Compressors

It took me a long time (too long) to truly understand how essential compression is to achieving the kind of mix I was after, and how important it is to producing a powerful, wall-of-sound style master. Without it, all your productions will inevitably sound like amateur garage band recordings. And while that might work for some old-school, raw black metal, you’ll never reach the brutal sonic heights of modern death metal, deathcore, or grind without it.
There’s four main types of audio compressors: VCA, FET, opto, and tube (also called varible-Mu). But there’s only two types I can’t live without for metal production, that I use far more than other types: VCA and FET. Instances of these appear over and over in every mix, and I’d recommend that your collection include at least one quality plugin for each (or, ideally, a single plugin that allows you to switch between different types). I will note, however, that an optical compressor will often work great on bass tracks.
As with anything (programming, gardening, surgery), the best way to learn how compression works is by jumping in doing it. Experimenting with it on real projects, getting a feel for what the knobs do, and what the numbers mean. Some of the concepts may not be instantly intuitive to beginners, and an in-depth explanation of compression is beyond the scope of this article, but here’s the long-story-short version: compression controls the dynamic range of a audio signal.
What’s dynamic range? In short, it’s the difference between the loud parts and the quiet parts of the signal. For me, it helps to visually imagine the waveform of any given audio track–those peaks and valleys. An EQed kick drum track, for example, might have a peak in the low-end, between 40hz and 100hz, with a dramatic dip in the mid-range, and then another peak in the high-end between 1000khz and 10000khz. The greater the difference between the peaks and the valleys, the greater the dynamic range. Reducing this range is not only key to a loud mix, but also necessary to preserve the details and character of a signal that might otherwise be lost in a full mix.
What do I typically compress? Pretty much everything: drums, vocals, bass, and clean guitars. High-gain guitars are often compressed enough to begin with, although sometimes I use multiband compression (compression that only targets a specifc frequency range) to tame palm mutes and tighten up the low end.
What I use:
Slate Digital All-Access: Almost everything I use on my mixes is included in the Slate Digital All-Access bundle, to the extent I rarely have to look outside of it.
Although you can buy each plugin individually, the subscription model, costing as low as $9.99/month (for a year commitment) is one of the best deals out there. Cheaper than Netflix. The Slate compressors I find most useful are: the FG-116 Black, a FET compressor based on the classic 1176 hardware, the FG-401, based on the SSL channel VCA compressor, and the FG-Stress, based on Empirical Lab’s Distressor, FG-Red, FG-Grey.
If you’ve got more money than I do:
FabFilter Pro C 2: The Fabfilter suite of plugins are just industry standard at this point. If you’re very serious about having the “best” plugins that the professionals use, this one of ’em. It’s too expensive for me, because I’m poor, and I rarely spend over $100 on a single plugin—but if you can afford it, you won’t be disappointed.
Free, but still excellent:
MCompressor by MeldaProductions (from a bundled suite of free plugins)
Fetish & dBComp by Analog Obsession (from his collection of free plugins on Patreon)
ReaComp (bundled with the Reaper DAW)
EQ
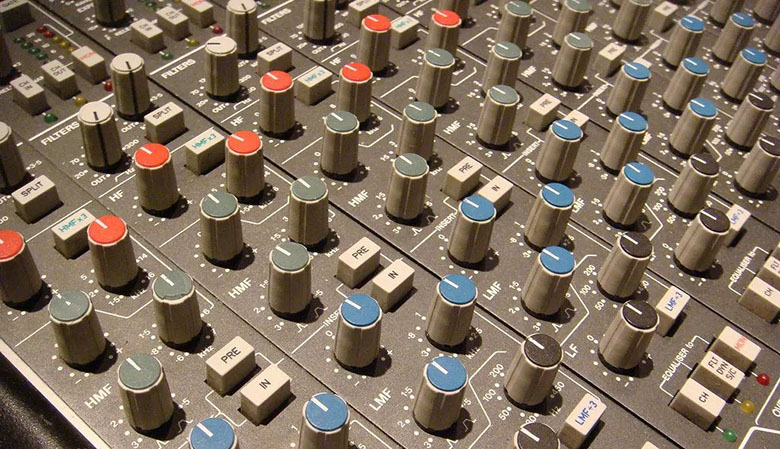
There may be as many EQ plugins as there are black metal albums with trees on the cover, yet, in many instances, you can get away with the stock EQ plugins bundled with your DAW.
But sometimes you’ll want an EQ that imparts its own unique character and saturation. An EQ modelled from classic analog gear, while subtle on individual tracks, can really take your full mix to another level.
In general, it’s best practice to start with tracks that sound great straight from the recording, before any processing whatsoever. You can do damage control with an EQ, but you can never truly fix a guitar tone or kick drum that sucks from the ground up. A “good enough, we can fix it in post” attitude during the recording stage will always lead to disappointing results.
Yet there’s not a single track in any project I work on that doesn’t have an EQ on it regardless, because every guitar, bass, vocal, drum—and ultimately the entire mix–will benefit in some way. Either to reduce narrow, overbearing, ugly frequencies from high-gain guitars and ringy snares, or greatly reduce or eliminate unwanted frequencies that unnecessarily compete for space with one another.
For example, there’s no good reason not to cut the frequencies out of guitars under 100hz or so, even if they sound good when soloed, because that’s what the bass is for. Keeping that information won’t do anything but muddy up your mix.
What I use:
Once again, Slate Digital All-Access Pass. Within the Virtual Mix Rack plugin, you’ll find a variety of modelled EQs, my favourite being the FG-S, based on SSL condoles. Outside of the mix rack, Slate offers Infinity EQ, which for me the best alternative to Fabfilter’s costly Pro-Q 3.
If you’ve got more money than I do:
Fabfilter Pro-Q3: Even if you’re just starting out, and have been watching YouTube videos, you’ve likely already seen this plugin in action. I think every serious engineer and producer across the entire recording industry relies on this one.
Free, but still excellent:
MEqualizer by MeldaProductions
SSQ by Analog Obsession
Transient Shapers
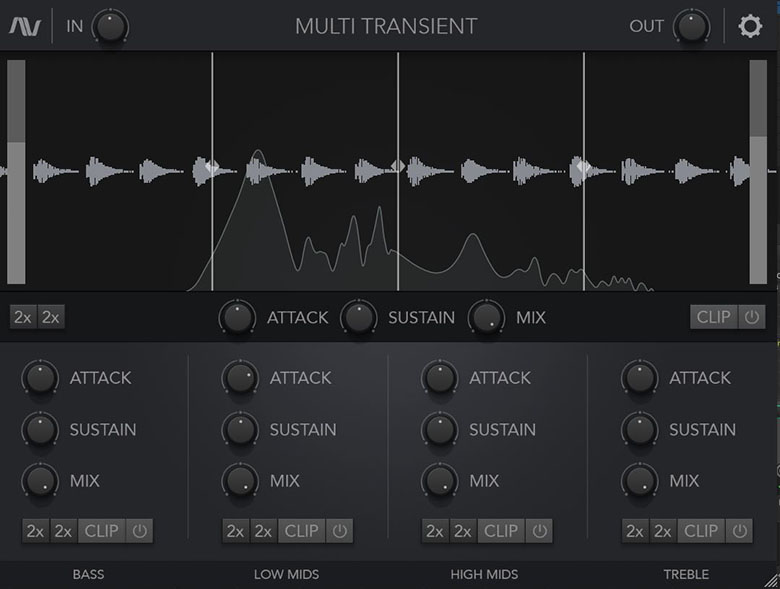
Transients are the short burst of energy you hear at the very beginning of any sound. The more defined/dramatic the transient, the punchier the sound.
Above all else, transient shapers are an invaluable tool for getting a snare drum to pop out of the mix. In particular, I’ve found them tremendously useful within the context of blastbeats. In a fast blast, the quick succession of hits prevents most drummers from getting as much power behind each hit they as would when playing a traditional rock or skank beat. Even when properly compressed, depending on the drummer and the drum itself, blasts still have a way of being buried in a mix, and transient shapers are a great way to increase their impact.
Transient shapers are also useful to reduce unwanted transients. Occasionally, you might encounter cymbals with an unnecessary amount of stick hit. You can easily take care of it with a transient shaper.
What I use:
Multi Transient: My favorite developer of amp sims for metal, Audio Assault, also offers this handy multiband transient shaper. Simple, efficient, sounds great. The Kilohearts transient shaper included with Slate Digital’s bundle also works well (you can buy it on its own for $39), but I always opt for Multi Transient.
If you’ve got more money than I do:
SPL Transient Design Plus from Plugin Alliance
Izotope Neutron 4 – Similar to the Kilohearts, this isn’t just a transient shaper, but includes one.
Another budget pick:
Smack Attack Transient Shaper by Waves
Free, but still excellent:
Saturation
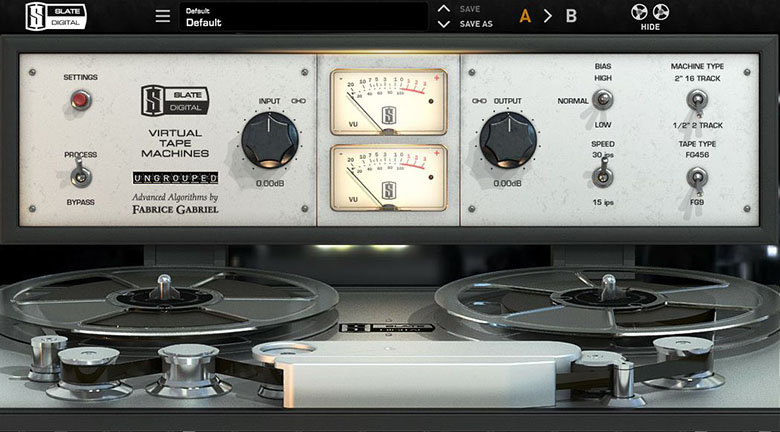
Saturation plugins—even those that are not modelled on real-world counterparts– emulate the inherent imperfections of analog hardware. Why? Because the imperfections of analog hardware adds harmonics, subtle compression, and cohesion to a mix in a way that clean, purely digital processing never can. These are multipurpose tools that can fatten the low-end and tame unwanted transients, and are typically designed to emulate specific types of analog equipment—most commonly tape, tubes, and transistors, each with their own unique characteristics.
While I don’t often use tube emulation (outside of amp sims), I’ll typically add tape emulation to every major bus/group. For transistor-style saturation, I often rely solely on the modelling built-in to compressor and EQ plugins based on existing, classic hardware, like the SSL console. Occasionally, I might use a plugin in the emulates a vintage pre-amp.
When mixing metal, a genre defined by over-driven, harsh sounds, keep in mind that light touch is all that’s required. Saturate, but take care not to over-saturate.
What I use:
Headcrusher by Audio Assault: A truly fantastic alternative to SoundToys expensive Decapitator plugin at a fraction of the price. This thing sounds great on drum rooms and parallel compression, or even when used in moderation on the drum bus.
Virtual Tape Machines: another plugin that’s included with the Slate Digital bundle. I use this one every bus, and having tried several premium tape emulators, even if money were no object, I genuinely prefer it to the rest.
If you’ve got more money than I do:
Free, but still excellent:
Chow Tape by Chowdhury DSP
IVGI by Klanghelm
Saturation Knob by Softube
Limiters
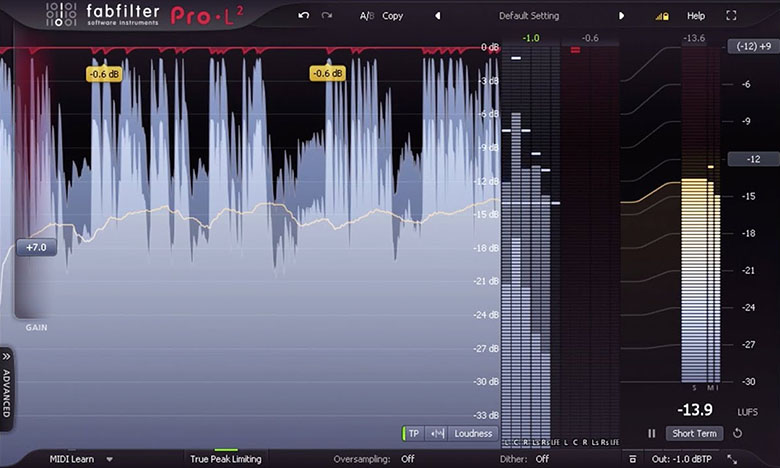
Limiters are compressors, and like other compressors, are used to control dynamic range. However, there’s a key difference: a limiter will prevent a signal from exceeding a specific volume set by the threshold.
I don’t use limiters as frequently as others might; they rarely if ever appear on my individual tracks, where dynamics are largely controlled by VCA and FET compression.
Limiters are mostly essential on the master bus, to bring an already well-balanced mix up to commercial volume, to lower the dynamic range to increase “perceived” loudness, and prevent the kind unpleasant digital distortion and compression that comes with pushing a digital signal too far by simply “turning it up”.
The best limiting are transparent: while you might use an emulation of a vintage compressor to colour the sound and add some “glue” to the drums, by the time you get to limiting, you’re ideally not adding anything new to the signal that will dramatically change it’s character.
What I use:
Slate Digital FG-X Mastering Processor: I don’t do much limiting outside of the master bus, and generally control headroom with some combination of volume adjustments, compression, and clipping. But for mastering, and especially for mastering extreme metal, this limiter nails it.
If you’ve got more money than I do:
Fabfilter L 2: No doubt the best there is. What else can I say. If you’ve got $200 to spend on a limiter, this is the one.
Free, but still excellent:
ReaLimit (Yeah, it’s Reaper)
Clippers
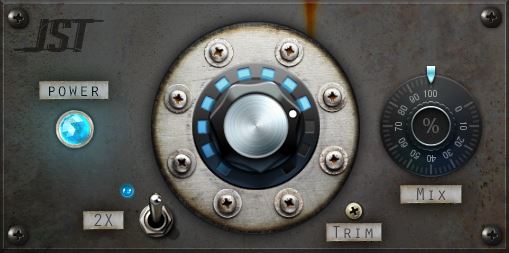
What does a clipper do? It clips off the peaks of a waveform. For extreme music, I consider a clipper absolutely essential on the drum bus no matter the sub-genre, and an integral part of getting a loud, in-your-face mix and master. Saturation and and compressors modelled on analog gear will clip a signal, but certainly not as transparently, dramatically, or predictably.
As the final plugin in your drum bus signal chain, the clipper will lop of the troublesome tops of any waveform that exceed a set threshold, without introducing any of the pumping characteristics of compression and limiting. It will increase the perceived loudness, and by taking care of those peaks before hitting the mastering stage, you’ll also get some harmonic distortion that’s enhances the overall sound, reducing the likelihood of contenting with ugly digital distortion later on. I’ll usually clip the drum bus as much as I can, right up to the point where I start hearing noticeably ugly distortion, and then pull back a bit.
Finally, if you’ve already got a nicely balanced mix, a clipper, followed by a limiter, will play a large roll in getting a loud master and an absurdly low dynamic range.
Loudness is a obviously a controversial topic (not everyone likes an album pushed to the absolute limit), but if you’ve ever wondered how bands like Anaal Nathrakh or Infant Annhilator get such loud, punishing masters, clipping plays a critical role.
What I use:
JSTClip by Joey Sturgis Tones: For whatever reason, I generally prefer to see what a clipper is doing to the waveform, but this one is so straightforward, and sounds so good on my drum bus, I keep going back to it. Even if it is one big knob.
If you’ve got more money than I do:
You know what, JST Clip. But there are other paid options that work well, and are even afforable. Among them: Big Clipper.
Free, but still excellent:
Freeclip (points for the imaginative name)
Gclip (a classic)
