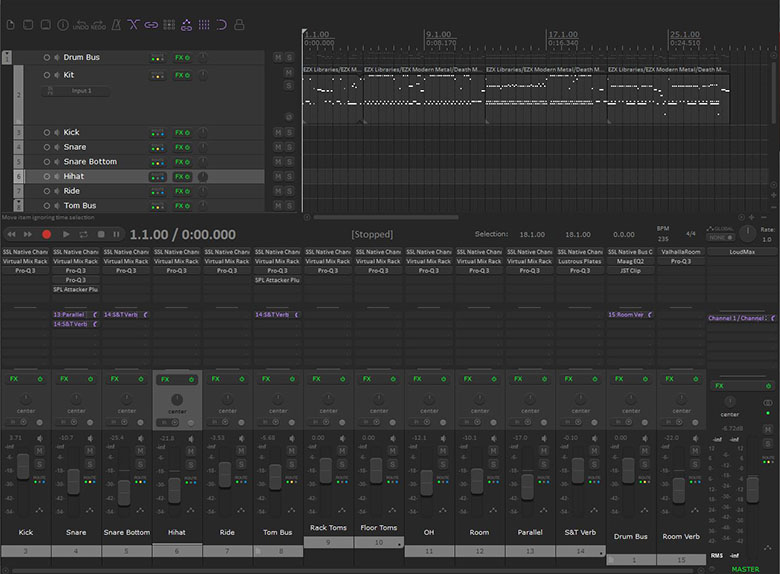
Note: the images included in this post are not intended to be used as a reference for “settings”. There are no magic numbers, and it’s the concepts, approach and workflow that are important. Where the dials and EQ bands end up will depend entirely on what you’re starting with and where it needs to go. The brutal truth: there are no shortcuts.
Starting Point
For this guide, I’ve opted to use samples from the Metal Machine add-on for EZDrummer, with each key part of the kit routed to a dedicated track in my DAW (Reaper). If you’re using EZDrummer yourself, as well as Reaper, and need help with the routing, you may find this video useful.
I’ll be taking an in-the-box approach, meaning I’ll be relying entirely on plugins instead of using any external compressors/EQs.
I’ll be breaking it down into nine tracks, which are:
- Kick Drum
- Snare
- Hihat
- Ride
- Rack Toms
- Floor Toms
- Overhead Mics
- Room Mics
In addition to these nine tracks, I group the rack toms and floor toms by place them in a “Tom Bus” folder/group, and create two additional tracks: one for parallel snare processing,and one for snare and tom reverb.
In the end, this is the same approach you would use for mixing a fully miked acoustic kit recorded with a multi-input interface, with each track corresponding to the shells and cymbals you would mic on the kit.
I’m not using any of the EZDrummer presets, and recommend avoiding presets for anything but putting together quick demos. Although the samples themselves have been slightly polished, they’re close to what you’d expect to get from an expertly miked kit.
Kick
My typical kick drum signal chain:
- SSL Channel Strip
- Noise Gate (Optional)
- FET or VCA Compression
- Parametric EQ with Frequency Analyzer
- A transient designer (Optional)
Coloration
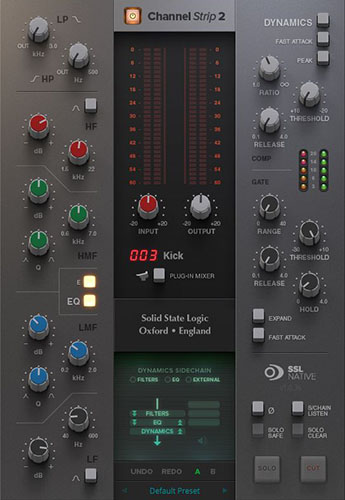
The official SSL Native Channel Strip 2 plugin from Solid State Logic. One of several excellent SSL plugins.
The first plugin I add to my signal chain adds some very subtle coloration to the sound. Although you may struggle to hear it on the individual track, I do this for the cumulative effect it will have.
The purpose is to emulate the sort of subtle saturation you’d get from running your mix through a traditional analog mixing board. It helps to temper the cold perfection of digital audio and the result is more organic sounding tracks.
Typically I reach for a channel strip plugin to handle this. My preference is currently the SSL emulations, and for this guide I went for the SSL Channel Strip 2, an official plugin from Solid State Logic themselves. It’s expensive to buy a perpetual license, Solid State Logic fortunately offers a subscription model giving you unlimited use for only $14.99/month.
Other solid, affordable alternatives are the SSL modules found in Slate Digital’s Virtual Mix Rack, Plugin Alliance’s SSL Consoles (subscribe to a mailing list and wait for a sale), and the popular SSL channel strip plugins from Waves.
Of course, you don’t have to go the SSL route–there’s plenty of other channel strip plugins, emulating Neve, Focusrite, etc. For my money, SSL style strips work best for rock/metal, but tastes vary.
Compression & Dynamics
For compressing my kick drum, I typically reach for a FET-style compressor, although I have recently taken to using an emulation of Empirical Lab’s Distressor hardware. In a pinch, a VCA compressor like the one you find on any SSL channel strip would work. The FET compressors and (especially) the Distressor add a bit more character and aggression to the results.
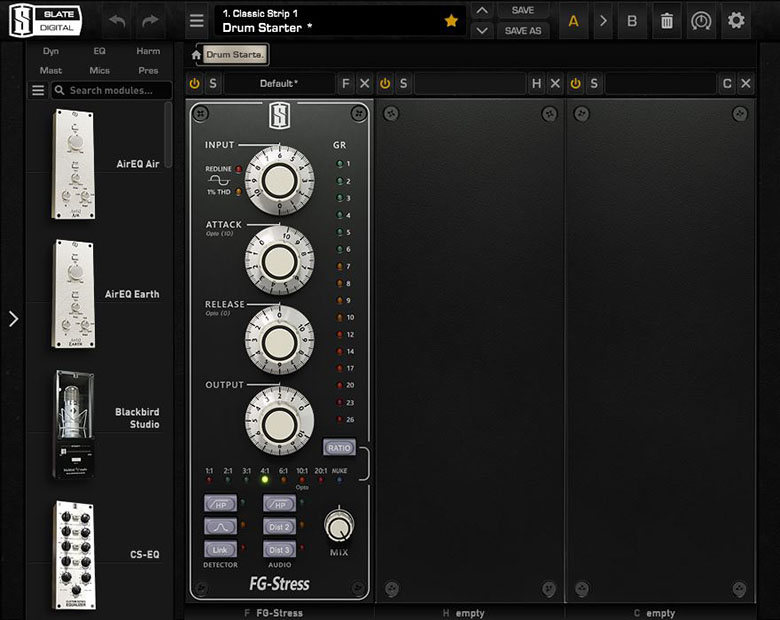
The Distressor module included in Slate Digital’s VIrtual Mix Rack. Another option is Empirical Lab’s official emulation of the hardware unit, “Arouser”.
Aim for about 10db of compression, at a 4:1 ratio, using a slow attack and a fast release. It’s important to keep transients in mind when compressing individual drums: a fast attack will soften the transient or eliminate it entirely–hardly the result you want for brutal metal. (Transients are the short burst of energy you hear at the beginning of a sound, which help your drums to “pop out” from the mix.)
I recommend starting with the slowest possible attack, and the fastest release.
Then it’s just a matter of adjusting the input knob until you get the desired amount of compression. Again, for kick, I aim for 10db. If the channel ends up exceeding 0db and starts clipping, just reduce the output in your compressor.
EQ
I take a two-stage approach to EQ. Because I use a channel strip at the top of my signal chain, I often use it to make some general adjustments to the EQ before the signal hits the compressor.
On a standard SSL EQ, my approach would be:
- 3db boost (or more) between 8khz (8000hz) and 10khz (10000hz)
- 6db cut (or more) at 500hz to eliminate some of the boxiness and “slap” sound from the mids
- 3db boost (or more) at 60hz for the low-end thud
My next adjustments to the EQ come after the compressor, and tend to be more extreme depending on what sort of kick drum sound I’m working with.

Some dramatic EQ moves in Fabfilter Pro-Q, shaping the kick.
Usually I use Fabfilter Pro-Q for this task. Both have frequency analyzers which I find useful whenever my ears fail me, but you can use your favorite multiband EQ for this. The stock Reaper EQ is good. It doesn’t matter and the results should be roughly the same.
In Fabfilter Pro-Q, I add a high-pass band (low cut) with a fairly extreme slope (usually around 48db, brickwalling is too extreme) to eliminate everything below 35h or 40hz. These sub-frequencies don’t add much to a mix other than mud. You can get rid of them.
Likewise, I add a low-pass band (high cut) to remove everything above 14khz.
The next moves will depend on the sound of your kick drum, but I almost always dramatically reduce everything between 200hz and 1000hz.
After this, I’ll sometimes use a bell to boost a little more around 60hz, and add some top-end with a high-shelf starting at 3khz (3000hz). This is to taste, and as I’ll remind you over and over, depends on the kick you’re working with. It’s important to remember there’s no magic numbers and you have to approach it case-by-case.
Problem Frequencies
A lot of times you’ll find that kick signal has too much energy/resonance somewhere between 90hz and 150hz. You’ll recognize this as the “note” of the drum. This is where I find the analyzer useful: typically, you won’t want the 80hz to 150hz range to exceed the volume of the 40hz to 80hz range, and you’ll need to reduce this to make room for bass and guitar.
Transients
Some people use transient designers on their kick drum, I often do not. But adding a simple plugin like SPL Attacker Plus at this point might help your kick to pop out of the mix a bit more if that’s what you want.
Snare
My typical snare drum signal chain:
- SSL Channel Strip
- Noise Gate (for cleaning up the bleed and taming resonances)
- FET Compression
- Parametric EQ with Frequency Analyzer
- A transient designer
Coloration:
As with the kick, I add some coloration to the sound by adding an SSL channel strip to the top of my chain, using it to make a few EQ moves (see below).
Gating
Adding a noise gate is especially important when you’re mixing an acoustic kit you’ve miked and recorded yourself. I’ve found the Gate:Drums module in Virtual Mix Rack works especially well for this, but you can get away with either stock DAW plugins or even spring for something like Fabfilter Pro-G if you’re made of money.
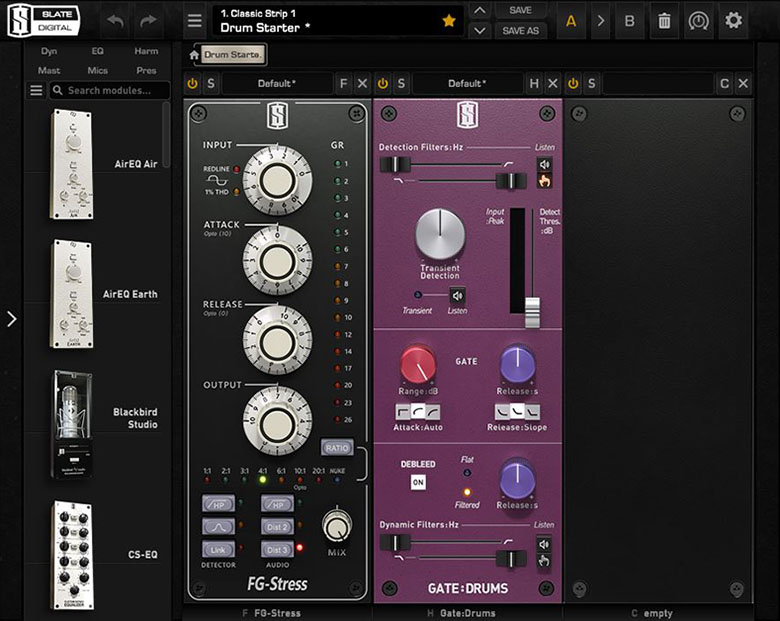
The snare compression and the Gate:Drums module in Slate Digital’s Virtual Mix Rack.
The main point here is to eliminate bleed from the rest of the kit, although I occasionally gate sampled snares to reduce unpleasant resonances. But don’t go too crazy with it, or you’ll risk undermining the unique character of the drum.
Compression
Once again, I recommend using a decent FET compressor for the snare, and approach it in a similar way. When increasing the input I aim for about 10db on hard strokes, at a 4:1 ratio, which typically translates to around 6db of compression on blast beats.
As with the kick, you’ll want a slow attack to avoid cutting off the transient, and a fast release. But sometimes it does pay to slow the release a bit on the snare, and the best way to find the sweet spot is via old-fashioned trial and error. Play with the knob and see what happens.
And don’t forget to dial back the output on the compressor if the channel is clipping.
EQ
This is straight-forward: on the SSL channel strip that precedes the compression, I boost about 3db at 6khz. I slightly boost the dominant frequency that you’ll find between 160hz and 300hz, depending on the tuning of the snare. And that’s it.
SIde note: I often choose my snare based on the genre and reference material. I find that snares that hit around 200hz to 230hz work best for most types of extreme metal. High-tuned snares are particularly well-matched for well-produced black metal, technical death metal, slam, and deathcore. For raw styles, like OSDM, blackend death, and some grind/hardcore, a lower-pitched snare drum might give better, more brutal results.

Shaping the snare in Fabfilter’s Pro-Q
Using Fabfilter Pro-Q following my compression, I do a low-cut with a fairly steep slope around 150hz, to remove the junk frequencies that will add nothing to the mix. Then I might boost fundamental frequency by a few decibels, and use a high-self to add some presence and air if necessary. (It usually is.)
Problem frequencies
Even despite your best efforts, it’s not unusual to end up with a snare that’s producing some pretty annoying resonances. A ringy-snare sounds nice, but it’s a good idea to tame pronounced frequencies in the mid-range. Once again, this must be approached case-by-case.
Transients

SPL Attacker Plus, a handy little tool for jacking up the transients on your snare drum.
You might be able to leave the transients untouched on the rest of the kit, but jacking up the transient on your snare is usually worthwhile, depending on what you’re aiming toward. For modern, aggressive genres that feature a lot of blasting like technical death metal and deathcore, I’d consider it essential.
It’s probably the easiest thing you can do to make your snare stand-out in a mix. I use SPL Attacker Plus. It’s one knob. Turn it up to 6 or higher and that’s that.
Hihat
My typical hihat signal chain:
- SSL Channel Strip
- Noise Gate (for cleaning up the bleed and taming resonances)
- Compression
- Parametric EQ with Frequency Analyzer
Coloration
Another instance of a SSL channel strip. I use this primarily to color the sound, and almost never make any EQ adjustments with it.
Compression:
Lighter compression this time around. You can use a FET, but a VCA like the SSL compressor, at a 4:1 ratio, will do the trick. Results from a FET, for me, are sometimes “too much”, although that comes down to taste.

For this mix, I opted to go with a 1176 model in Virtual Mix Rack. The distressor would do the job, or even a VCA like the compressor on SSL’s channel strip.
Although in metal the hihats often aren’t taking center-stage, but adding some sizzling presence, a slow attack/fast release combo is still recommended.
You can experiment with adding some saturation, but it’s not essential, unless you find your hats especially dull.
EQ
Using Fabfilter Pro-Q, I identify the junk frequencies and chop ‘em out using a low-cut, high-pass band with a steep slope. You usually find you can cut out everything under 300hz, sometimes up to 500hz.
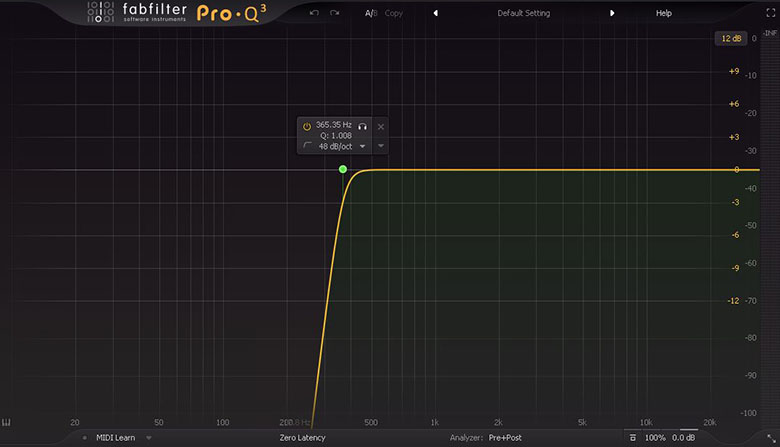
Eliminating the junk frequencies the hithat doesn’t need.
It’s also a good idea to add a high-shelf band and reduce everything between 3khz and 14khz a few decibles. This might sound counter-intuitive, but later when you’re adding air and presence to your drum bus, or the mix bus, hats and cymbals without this adjustment can end up being way too bright, brittle-sounding and harsh, overwhelming the mix.
Problem Frequencies
Lots of potential for annoying resonances. Hunt for them and snuff them out with narrow band cut. Just don’t over do it.
Rack Toms & Floor Toms
My typical tom signal chain:
- SSL Channel Strip
- Noise Gate (for cleaning up the bleed and taming resonances)
- FET Compression
- Parametric EQ with Frequency Analyzer
- A transient designer
Coloration
Another instance of an SSL channel strip? Get used to it.
Gating
Gating your toms isn’t only useful to eliminate kit bleed, but sometimes it helps to keep a lid on the lingering resonances/notes of the toms, effectively tightening them up. I’d consider it essential for tech death and deathcore, and less essential for doom and rawer styles of metal (but still worth fiddling with).
Compression
For the toms, I take the same approach I do with the kick and snare. I use a FET compressor (or the Distressor emulation), and compress to about 10db with a slow attack/fast release. A 4:1 or 6:1 ratio will do the trick. Nothing fancy.
Again, make sure you aren’t clipping. If you are, reduce the output on the compressor.
EQ
First move: Add about 3db of high-end around 8khz using the channel strip to add some of that smooth SSL presence.
Then, in Fabfilter Pro-Q, use a low-cut with a steep slope to eliminate everything under 60hz, and high-cut with a steep slope to kill everything above 14khz.
Next, I recommend reducing some of the mids to combat the boxiness of the toms. It’s more or less the same thing I do with the kick, but in this instance, I know that the overheads, and especially the room mics, have the tom mids adequately covered. Pulling down a bell with gentle slope around 400hz to 500hz should be enough. You may not be surprised that it depends a bit on the toms you’re working with.
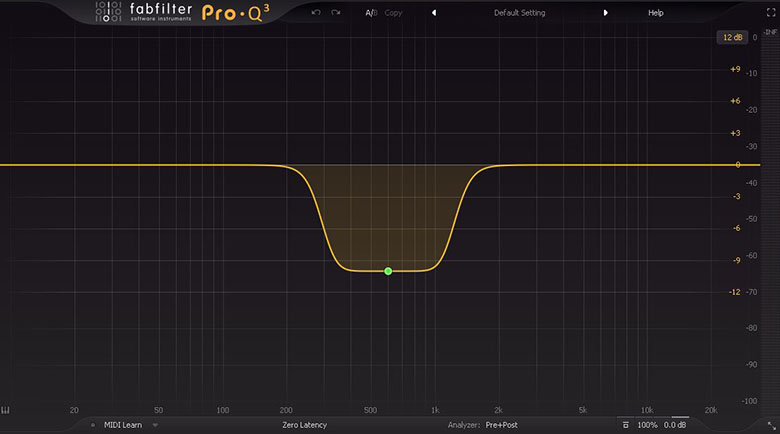
A dramatic dip in the midrange to remove the boxiness. The room mics and overheads have it covered.
Problem Frequencies
Sometimes the notes of the toms resonate a bit too much, which can be solved with a narrow band and a few decibels of reduction. It’ll depend on the toms–but if you hear something annoying, it never hurts to search for the offending frequency and reduce it a bit.
Transients
Another instance of SPL Attacker Plus, or comparable transient designer plugin, will go a long way to helping your toms cut through the mix, although it’s probably not necessary to boost them as aggressively as you would boost the snare.
Overheads
My typical Overhead signal chain:
- SSL Channel Strip
- FET or VCA Compression
- Parametric EQ with Frequency Analyzer
Coloration
The SSL channel strip. Just to have it there. No EQ moves.
Gating
Don’t even worry about it.
Compression
Usually I use FET-style or VCA compression for overheads. Unlike the kick, snare, and toms, the amount of compression you’ll want to apply here can vary widely, depending on your source tracks. If your overheads have a lot of bleed from the rest of the kit, over-compressing will potentially change the sound of your mix in an underdisrable way.
When the bleed is minimal, I generally add between 5db to 10db of compression, with a slow attack/fast release, and a higher ratio: 8:1, maybe even 12:1. If you’re getting too much transient information in the signal (stick hit, usually), you can soften it with the EQ. But you’ll want to make sure that your cymbals have adequate sustain.
When there’s a lot of bleed, extreme compression will result in an increase in perceived loudness of the rest of the kit, and resulting in a larger impact on the drum mix overall. Which will either sound cool if you’re lucky, or decidedly uncool if you’re not. Reducing the amount of compression–both the ratio and the input level–can combat this.
It could be just me, but I often spend more time getting the overheads right, via trial and error, than I spend on anything else. More than any other element, you need to get overheads right during the miking stage. You can replace kicks, snares, and toms during mixing, but your options are very limited when it comes to poorly recorded overhead tracks.
EQ
Ignore the SSL channel strip and head straight for Fabfilter Pro-Q. Then, do a fairly aggressive low-cut around 500hz (or higher). Bleed from the kick and snare sometimes works in the mix, and sometimes it doesn’t, but in my experience it’s largely unnecessary, and you can rely on the room mics to adequately provide room sound.

Rolling off the useless frequencies under 500hz, and reducing the harsh high-end.
And like the hihat, it’s often a good idea to use a high-shelf to reduce everything after 3kz so it doesn’t overwhelm the mix later on. Nothing extreme; a few decibels will suffice.
Problem Frequencies
Could be anywhere. At risk of repeating myself, if you hear an unpleasant resonance or whistle or squeak you can’t ignore, best bet is to find it with Fabfilter and eliminate it.
Room Mics
My typical Room Mics signal chain:
- SSL Channel Strip
- FET or Distressor Compression
- Saturation
- Parametric EQ with Frequency Analyzer
Coloration
You guessed it: the SSL channel strip. Or use a Neve strip, or omit it entirely. We’ll be using some saturation this time.
Compression
Once again I’ll preface this with “tastes vary”, but I usually squash the room signal to within an inch of its life.My current routine is to use the Distressor module found in Slate Digital’s Virtual Mix Rack (or, alternatively, the much pricier “official” Arouser plugin from Empirical Labs). Previously I would opt for FET compression at 12:1 or 20:1 ratio.
With the distressor, I compress at a ratio of either 10:1, 20:1, or sometimes use the “nuke” option. A slow attack/fast release often works best, but you can play around with this and get some cool results, because you’re not relying on the room mics for transients.
But that’s the gist of it: compress, compress, compress. Dial back the output on the compressor if it’s clipping.
Saturation
Admittedly, saturation is optional–a FET compressor or a distressor will add some analog character themselves–but I think some additional saturation adds even more life to your room mics, and helps out both the snare and the toms.
If I made more money in life, I might opt for some industry-standard saturation like SoundToys Decapitator for this task, but fortunately there’s a very capable alternative that costs a fraction: Headcrusher by Audio Assault.

Adding some saturation to our room mics using Audio Assault’s Headcrusher, an inexpensive alternative to SoundToy’s Decapitator.
In Headcrusher, I usually opt for the British setting. You don’t have to overdo it, and a little will go a long way.
Other popular saturation plugins include: Fabfilter Saturn, Black Box, and Izotope Trash.
EQ
My first move when EQing the room mics takes place in the channel strip: I remove some mids, usually about 3db at around 500hz.
Then, I move to Fabfilter Pro-Q, and low-cut everything below 200hz with a reasonably gentle slope. Those low frequencies don’t contribute much but mud to the overall mix.
Parallel Snare
My typical Parallel signal chain:
- FET or Distressor Compression
- Saturation (Optional)
- Parametric EQ with Frequency Analyzer
Not essential, but recommended: create a track, name it “Parallel”, and send your snare to it. Now we’re going to compress it to hell.
This is good practice for a couple different reasons. The first: when you need to dramatically gate your snare to eliminate excess bleed, you inevitably lose a bit of its body and character. With parallel compression, we can restore some of it.
The second reason is that you may want to shape the body and mids in a way that isn’t practical to do on the snare channel itself. Your snare isn’t ringy enough? Turn up the fader on the parallel channel. Too ringy? Turn it down. Pretty straight forward.
Compression
A FET compressor at high ratio works well for this. 12:1 or even 20:1 is a good bet, and at least 10db of compression.
While we still want a fast release, in this instance, a slow attack is not ideal. We don’t need any transient information here: a little bit of pumping can even work. Increase the attack speed until the transient is nearly muted.
Saturation
Saturate to taste. There are no rules. You can do whatever you want and no one can stop you.
EQ
With Fabfilter, I usually do a low-cut around 300hz with a fairly steep slope, and a high-cut around 8khz. And this may be the only time in an entire mix that I will slightly boost the mids in the 500hz area, although it isn’t always necessary.
Reverb
My typical Reverb signal chain:
- SSL Channel Strip
- Plate (or Room) Reverb
- Parametric EQ with Frequency Analyzer
Even when your goal is a tight, technical death metal drum mix, it’s worthwhile to add a little bit of reverb to the snare for presence.
A room or plate reverb is best; popular choices include Valhalla Plate and Lustrous Plates and Lexicon. Update: since I’ve written this, I’ve taken a strong liking to Izotope Neoverb, which has replaced all of my other reverbs.) But room reverbs will do the job too.

Lustrous plates, a very good option for snare and tom reverb.
I send both the snare and toms to the reverb. There’s no magic number for dialing in perfect snare reverb: it’ll depend on the rest of the mix, the genre, the desired results. A short reverb might work for deathcore, a long reverb might work for black metal. It’s another job trial-and-error. I usually start with a decay of around 2 seconds and dial it back or forward.
EQ
On my reverb channel, I use Fabfilter to apply a fairly extreme low-cut, rolling off everything under 1000hz. If it’s a bit too dark, I’ll add some air by boosting everything after 8kz with a high-shelf.
Getting the Levels Right
Before we look at the drum bus, it’s not a bad idea to set some levels.
As a rule of thumb, I generally balance the kick channel, snare channel, and toms channel, making sure they’re hitting a maximum peak of about -12db or so. Alternatively, you could use a limiter on every channel, but I find this unnecessarily cumbersome. Within the context of a full mix you’ll find certain elements need adjustment, and I’d rather just fiddle around with the faders.
My hihat and overheads typically sit significantly lower in the mix, around -24db (and sometimes even lower). That might sound low, but it usually isn’t, and you can always adjust it later. Listen to any album and you’ll discover the hats and cymbals aren’t mixed as loudly as you might intuitive expect.
Likewise, the levels of the room mics, parallel compression, and reverb are adjusted to taste, but never exceed -24db. The level of the room mics can vary wildly from production to production. Sometimes you want a dry mix, sometimes you want more room.
Drum Bus
My typical Drum Bus signal chain:
- Slate Digital Virtual Tape Machines (Optional)
- SSL Native Bus Compressor 2
- Maag EQ2 (or EQ4)
- JST Clip
Coloration
First up on the bus chain comes Slate Digital’s Virtual Tape Machines. Optional, but recommended. This is tape saturation, and my favorite of the tape saturation plugins I’ve tried. It both fattens up the mix and compresses it a bit. I use the default settings, changing nothing.
Compression

Bus compression via SSL Native Bus Compressor 2. Aim for about 2db of compression, a 2:1 ration, a slow attack and a fast release.
Next I add SSL Native Bus Compressor 2. While it doesn’t have to be this specific plugin, a VCA compressor does work best for this task (in my opinion). Slate’s VBC Rack includes a very good emulation of this famous compressor (VBC Grey), and Waves offers up another good option.
We won’t be compressing heavily here, and a light touch is required. The purpose of this is to add some glue and cohesion to the drum mix, making everything sit nicely together. You’ll want to aim for 2db to 3db of reduction. A ratio of 2:1 is the safest bet, with a 30ms attack time and 0.1ms release.
EQ
On my drum bus, I often only use EQ to add some air. The best (read: easiest) tool I’ve found for this is a handy plugin I scored for free from Plugin Alliance called Maag EQ2, based on a famous hardware unit. I set the Air Band to 20khz, and turn the gain up to somewhere between 6db and 8db. And that’s it.
Clipping

JST Clip, the last and most important plugin on your drum bus signal chain.
For metal (and maybe in other genres, who knows), clipping your drums is often essential. Skip it at your own peril.
My go-to clipper is JST Clip. I’ve tried others, but this plugin just seems to do it better. And it’s inexpensive; I paid $19 when it was on sale.
Using compression and saturation, it both increases the perceived loudness of the mix, and cuts off wayward peaks in the signal without significantly coloring the mix (unless you overdo it). It effectively increases your overhead.
JST Clip is essentially a single knob, but if you just start turning it up, you’re going to encounter ugly digital distortion and artifacts pretty quickly. To get the best results: first, I adjust the trim to -10db. This means the signal will not exceed 10db.
Next, I solo the kick drum channel and play it back. Because low frequencies are packed with more energy than high frequencies, they have a tendency to distort and mutate faster than higher frequencies as you increase the volume.
While listening to the soloed kick track, start turning up JST Clip’s knob. The goal is to turn it up as far as you can before it starts introducing unpleasant artifacts and digital distortion. Once you do encounter that distortion, roll off slightly until the kick sounds natural and unaltered.
Un-solo the kick, playback the performance, and there you have it. Fully-mixed, perfectly clipped metal drums.
Now you just have to mix all the other stuff. Good night and good luck.
